


What angle should you sharpen a chainsaw chain at?
Most chainsaw chains are sharpened with a top-plate filing angle of about 30 degrees, which is the angle between the file stroke and the bar seen from above. Chains built for ripping or for hard, frozen wood are often filed shallower, around 25 degrees, for a stronger, longer-lasting edge that cuts more slowly. Always check your chain manufacturer's specification, because the ideal angle varies by chain type.Angle is set in three ways at once, so keeping the file positioned correctly matters more than any single number.
- Top-plate angle: about 30 degrees for general crosscutting, 25 degrees for ripping or hardwood.
- File height: hold the file level so it seats naturally in the tooth and shapes the side plate correctly, though a few chains call for a slight down angle.
- Depth gauge: file the raker to roughly 0.025 inch (0.65 mm) below the top plate so each tooth bites the right amount.
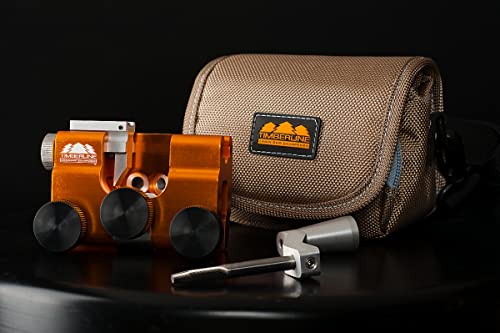
Most chains carry witness marks stamped on each cutter that show the original grinding angle, so line your file up with those rather than guessing. A 2-in-1 file tool or file guide builds these angles in, which is the easiest way to stay consistent. For the file-size chart and the full sharpening method, see our chainsaw sharpening guide, and for reading chain markings, our chainsaw chains guide. Figures here are typical published settings, not tested measurements.
What is the difference between the top-plate angle and the down angle?
The top-plate angle is the sideways angle of the file seen from above, usually about 30 degrees, while the down angle is how far the file tips below level, which most chains want at or near zero. The side-plate angle is set automatically by the file's height and diameter as you file.Getting the file size and height right therefore sets two angles at once, which is why matching the file to the pitch matters so much. Most chains carry witness marks on the cutter showing the intended top-plate angle, so line the file up with those rather than judging by eye.
Why does the sharpening angle change for ripping or hardwood?
The angle drops to around 25 degrees for ripping and for hard or frozen wood because a shallower top-plate angle makes a stronger, more durable edge that cuts slower but lasts longer. A steeper 30-degree edge is sharper and faster in soft, clean wood but wears and chips sooner in tough material.Ripping chains, used for milling boards along the grain, are often filed at about 10 degrees for a smooth, slow cut. Match the angle to the work rather than using one setting for everything; our chainsaw milling guide covers the low ripping angles in more detail.
What happens if you sharpen at the wrong angle?
Sharpening at the wrong angle makes the chain cut slowly, grab, or wear quickly, even though the tooth looks sharp. Too steep an angle leaves a fragile edge that dulls fast, while too shallow an angle cuts slowly and needs more push.Inconsistent angles between teeth are worse than a slightly wrong but even angle, because they make some cutters do more work and steer the bar to one side. If you have filed at a varying angle, reset every cutter to the same angle and length using a guide, then keep to it. A 2-in-1 file or bar-mounted guide holds the angle for you and is the simplest cure.
How do the depth gauges work with the filing angle?
The depth gauges set how much wood each cutter takes at its filed angle, so the two work together: the angle shapes the edge and the raker controls the bite. Lower the rakers to about 0.025 inch below the top plate every few sharpenings, or the sharp cutters cannot reach full depth.As you file cutters back over their life, the tooth gets lower and the raker sits relatively higher, which is why rakers need occasional lowering rather than attention every time. Use a depth-gauge tool and a flat file, and round the raker's front edge so it feeds smoothly. These are typical published settings; always check your chain maker's chart.
How do you keep the same angle on every tooth?
Keep the same angle by using a file guide, 2-in-1 tool, or bar-mounted jig that fixes the file position, and by filing every cutter with the same number of strokes. Free-hand filing can match a guide once your technique is reliable, but the marks stamped on each cutter are the reference to follow.Mark your first tooth so you know when you have gone all the way around, and file all the cutters facing one way before flipping the saw to do the rest.


