
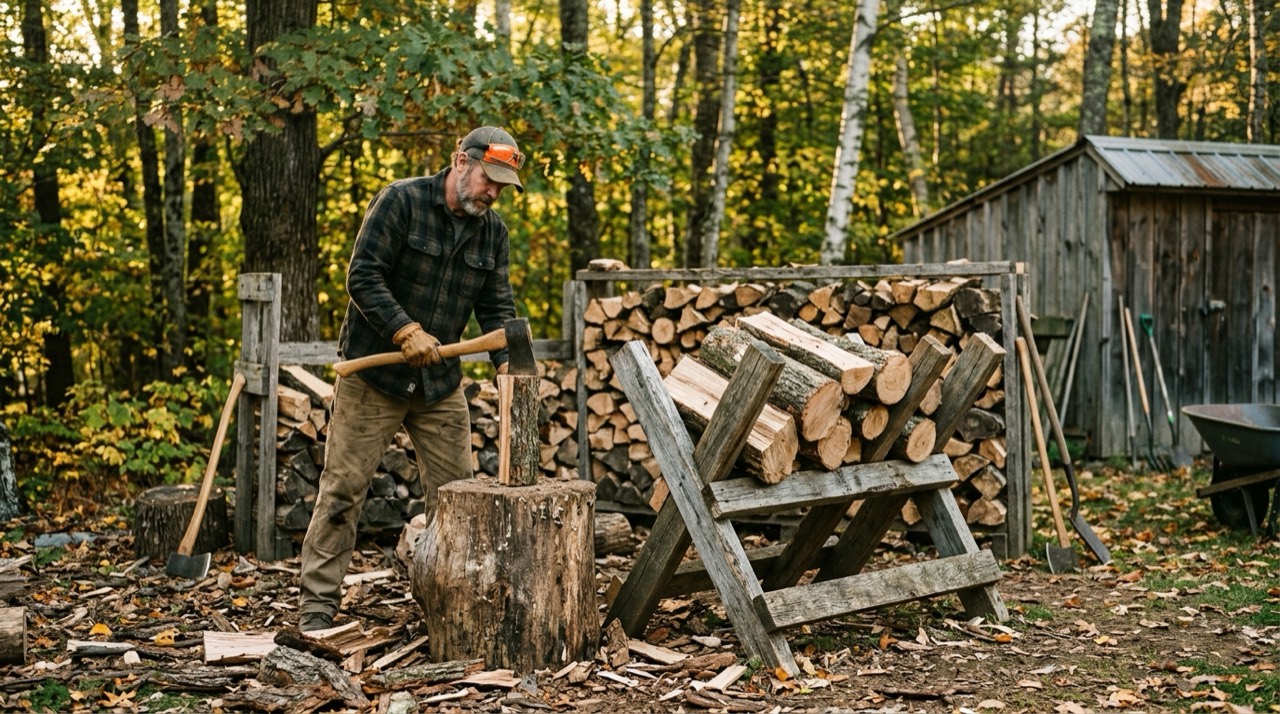


What makes a good DIY log holder for cutting?
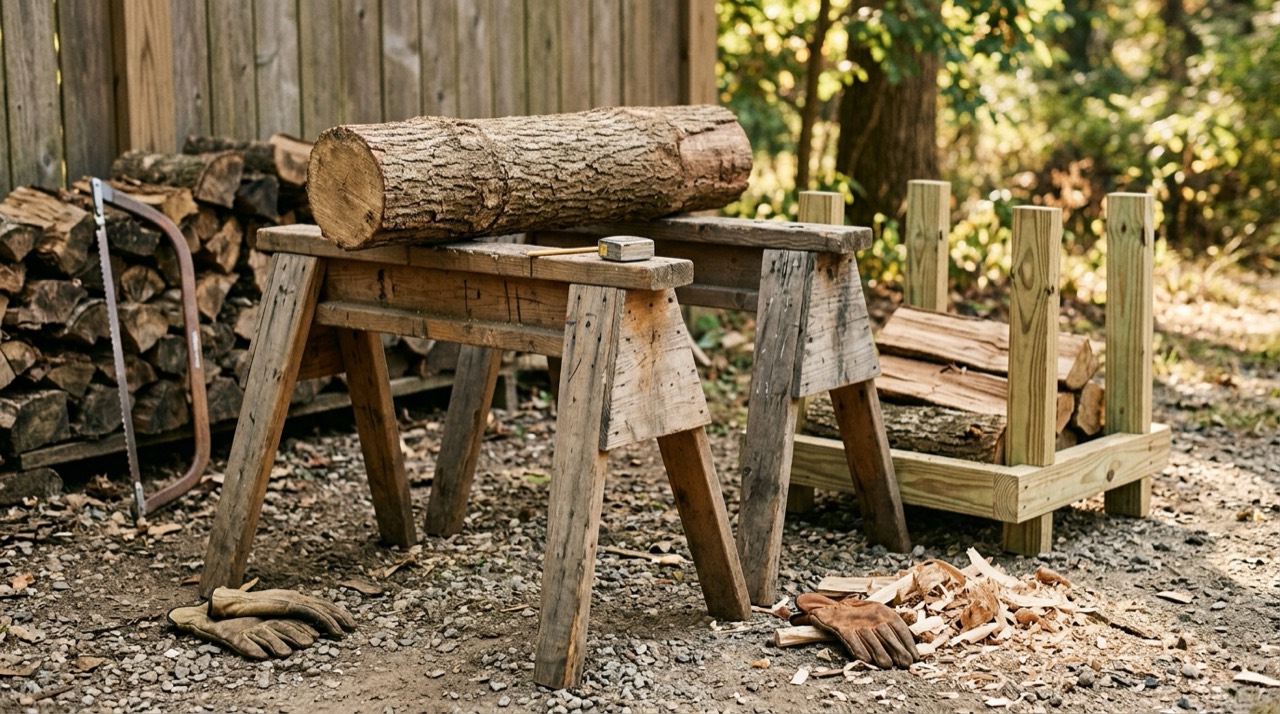
A good DIY log holder holds the log still, raises it to a comfortable cutting height, and has a wide, stable base that will not tip under a heavy round. The classic homemade design is a wooden sawbuck — an X-frame that cradles the log in its crossed timbers.
The appeal of building your own is cost and fit: scrap timber and a few bolts make a serviceable cradle sized to the wood you actually cut. Build it from timber you trust — straight, unsplit stock — because the frame takes the full weight and vibration of the log and saw. The design does not need to be clever, but it does need to be rigid and stable, because a holder that racks or wobbles is more dangerous than no holder at all. Before you build, look at how a bought frame secures the log — many DIY cradles copy the grab and cradle ideas from commercial sawhorses using a chain or strap.
What tools and materials do you need to build a sawbuck?
Building a sawbuck needs little more than construction timber, coach bolts, and basic hand or power tools — a saw, a drill, and a spanner cover most of it. The materials list is short because a good sawbuck is a simple, rigid frame, not a fine piece of joinery.
- Timber: treated 2×4 for a light frame, or 4×4 for a heavy-duty buck that will not flex.
- Fixings: coach or carriage bolts with washers and nuts, which hold far better than nails or screws under vibration.
- A saw to cut the legs and rails to length, and a square to keep the frame true.
- A drill and bits sized to your bolts for clean, tight holes.
- A spanner or socket to draw the joints up tight.
- Optional: a length of chain and a hook, or a ratchet strap, to secure the log.
Buy timber that is straight, sound, and unsplit, because the frame carries the full weight and vibration of the log and saw. Spending a little more on decent stock and proper bolts is what separates a buck that lasts from one that racks loose in a single season.
How do you build a simple wooden sawbuck?
Build a wooden sawbuck by making two identical X-shaped end frames and joining them with long rails, so the crossed timbers form cradles that hold the logs. The steps below outline the classic build.
- Cut four sturdy legs of equal length from treated timber, such as 2×4 stock.
- Cross two legs into an X and bolt them where they overlap, forming one end frame.
- Repeat to make a second, identical X frame.
- Join the two frames with long horizontal rails bolted near the top and bottom.
- Add a diagonal brace along the base so the frame cannot rack sideways.
- Check every joint is tight and the frame stands square before loading a log.
Bolts hold up far better than nails or screws under the vibration of cutting. Keep the cradles deep enough that a round log settles in without rolling out.
What are the common DIY log-holder designs?
DIY log holders fall into a few proven shapes, each suiting a different amount of wood and skill level. The table below compares the common homemade designs by how they hold the log and who they suit.
| Design | How it holds the log | Best for |
|---|---|---|
| Classic X-frame sawbuck | Crossed timbers cradle one or more logs | All-round firewood bucking |
| Notched-beam buck | Sawn notches seat each log in a row | Cutting many rounds to one length |
| Log cradle bench | A boxed V-trough holds the log in a channel | Steadier hold on shorter logs |
| Pallet-based cradle | Upright pallet sections form a rough V | Cheap, quick, light-duty use |
The X-frame sawbuck is the design most people build first because it is forgiving, stable, and cradles round wood naturally. A notched beam speeds up cutting a batch to identical lengths but takes more careful setting out. A boxed cradle holds a single log more securely, closer to how a bought V-cradle works. Whichever you copy, borrow the grab-and-cradle ideas from commercial sawhorses so your homemade frame locks the log rather than just resting it.
What dimensions should a DIY sawhorse be?
Size a DIY sawhorse so the cradle sits around hip height — roughly 30 to 36 inches — with a base as wide as the frame is tall for stability. Those proportions let you cut upright while keeping the holder from tipping.
Match the cradle spacing to your firewood length: crossed timbers set so a log rests with the cut-off end overhanging by a workable amount. Wider stances resist tipping; taller, narrow builds are quicker to load but far easier to knock over. If in doubt, build lower and wider than you think you need — stability beats convenience every time when a running chainsaw is involved. Aim to match the working height of the sawhorses and cradles covered in our guide.
How do you add a log grab or chain to a homemade sawbuck?
Add a grab to a homemade sawbuck by fixing a length of chain to one side of the frame with a hook to cinch over the log, so the wood is locked down rather than merely cradled. A simple chain-and-hook turns a bare buck into a proper cutting station.
- Bolt one end of a short, strong chain to an upper rail on one side of the frame.
- Fit a grab hook to the free end so you can shorten and lock the chain quickly.
- Load the log into the cradle with the cut-off end overhanging as usual.
- Pull the chain over the log and set the hook into a link so the wood cannot roll.
- Test that the log is truly locked before starting the saw, and re-cinch it as the log shortens.
A ratchet strap can stand in for a chain on lighter wood and is gentler to fit, though it wears faster near the cut. Whichever you use, the point is the same: a homemade holder should secure the log, because a cradle alone still lets a round log turn toward the bar as you cut.
How do you treat and weatherproof a wooden log holder?
Weatherproof a wooden holder by building it from treated timber and keeping it out of standing water and permanent damp, so the frame does not rot or split. An outdoor holder leads a wet, dirty life, and a little protection keeps it sound and safe for years.
Treated construction timber already resists rot, but the cut ends you make when building are the weak points, so a brush of exterior wood preservative on fresh cuts and bolt holes is worth the few minutes. Store the buck under cover between sessions rather than leaving it sitting on wet ground, where the feet wick up moisture and rot first. Check it over each season for splits, soft spots, and loose bolts, and replace any cracked timber rather than nursing a compromised frame — a DIY holder carries no load rating, so its condition is your only guarantee. Because the materials are cheap, rebuilding a tired leg or rail costs little. Look after the frame the way you would the rest of your firewood tools, and a homemade buck stays a safe, stable base under a running saw.
How do you keep a homemade log holder safe to use?
Keep a homemade holder safe by checking it is rigid, stable, and free of loose joints before every session, and by always securing the log with a chain or strap. A DIY frame carries no rating, so you are the quality control.
Homemade holders fail in predictable ways: joints work loose under vibration, timber splits, and light frames tip under a heavy round. Inspect for movement, re-tighten bolts, and replace cracked timber rather than nursing it. Never cut a log balanced loosely across a flat frame, and never cut between two supports where the bar can pinch. Cut only on an overhanging end, in full PPE — the chainsaw chaps and protective gear matter just as much on a homemade cradle as a bought one.
What mistakes do people make building a DIY log holder?
The common DIY mistakes are building too tall and narrow, using nails or screws instead of bolts, and skipping any way to secure the log. Each one shows up the first time a heavy round goes into the cradle.
- Building tall and narrow, so the frame tips under a heavy log instead of standing firm.
- Fixing joints with nails or screws that work loose under the vibration of cutting.
- Leaving out a diagonal base brace, so the frame racks sideways over time.
- Making the cradles too shallow, so round logs roll out rather than seating.
- Adding no chain or strap, so the log is only rested, not locked.
- Using split or undersized timber that flexes or cracks under load.
All of these are easy to design out: build low and wide, bolt every joint, brace the base, cut the cradles deep, and add a grab. A homemade holder that is rigid, stable, and able to lock the log is genuinely safe for bucking; one that skips these basics is more dangerous than cutting on the ground, because it invites you to trust a frame that can move. Get the fundamentals right and the saw does the rest.
When is a shop-bought log holder worth it over DIY?
A shop-bought holder is worth it when you cut a lot of wood, handle heavy logs, or want a built-in grab that a simple sawbuck lacks. DIY wins on cost and custom sizing; bought frames win on rigidity, portability, and secure clamping.
If you buck the occasional load of branch wood, a well-built wooden sawbuck is genuinely all you need. If you process cords, want to fold the frame away, or need to clamp thick logs dead still, a steel sawhorse or clamping holder pays for itself in speed and safety — compare options in our best log holder for cutting guide. Many cutters do both: a homemade sawbuck for volume and a bought clamp or a log jack from the right firewood tools for the awkward, heavy pieces. Whichever route you take, the holder is only half the job; a sharp chain and good technique matter more than the frame beneath the log.