


How do you split kindling safely with a hatchet?
Split kindling with a hatchet by resting the edge on the wood and driving both down onto a block together, keeping your hands above the head and your body out of the swing path. This "contact" method removes the risky moment of a fast swing landing on a small, unstable piece.The contact split is the single most useful hatchet skill. Stand the piece of wood on a solid chopping block, set the hatchet edge on top of it, and bring the wood and hatchet down together so they strike the block as a unit. Because the edge is already seated, it cannot glance off, and your leading hand grips the wood well clear of the blade. Repeat, halving each piece, until you have a fistful of pencil-thin kindling, working from the outside of a round toward the centre so each split has an escape path. For a full overview of technique and gear, start with the hatchets and camp axes guide.
When should you baton instead of swing?
Baton a hatchet when you need controlled splits in knotty or twisted kindling, tapping the poll of a second piece of wood to drive the edge straight down the grain. Batoning keeps the cut precise and the swing energy low, which is ideal in a crowded camp.Batoning works because you split with pressure, not momentum. Seat the edge across the end grain of an upright piece, then strike the back of the head with a wooden baton, never a steel hammer, which can mushroom the poll. Drive the edge down the grain until the piece falls apart, moving the strikes toward the toe or heel if the head starts to bind partway through. The technique shines for making feathersticks and fine fire-starting material, and it is far safer than swinging at a short, wobbly billet. A convex-ground forged head, like those on Gransfors Bruks and Husqvarna hatchets, batons cleanly without the edge binding.
How do you free a stuck hatchet head?
Free a stuck hatchet by rocking the handle side to side along the grain, never levering it up and down, which can snap a wooden haft. If it is deep, tap the exposed poll or lift the whole billet and strike it back down onto the block.A stuck head is the most common firewood frustration, and forcing it is how handles break. Twist gently in line with the split so the wedge of the head widens the crack and releases. Never lever the handle up and down against the round, because that side-loads the haft just below the head, exactly where wooden handles snap. If twisting fails and the hatchet is buried in a round, lift the round with the hatchet still attached and bring the poll down onto the chopping block, letting the round's own weight drive the split. Choose a straight-grained round to split in the first place and you will rarely get stuck. Knotty, gnarled pieces are better set aside for a splitting axe or maul.
What wood is safe to process with a hatchet?
Process only wrist-thick or smaller pieces with a hatchet, and split rounds no larger than the hatchet's head is long. Anything bigger belongs to a full-size splitting tool, because oversized wood invites glancing blows and a stuck head.Match the tool to the wood and most accidents disappear. A hatchet excels at reducing already-bucked pieces into kindling and quartering small rounds; it is not a felling or bucking tool. Dry, straight-grained softwoods such as pine and cedar split easily and make excellent kindling, while knotty, twisted, or green hardwood fights back, wedges the head, and tempts you into unsafe force. Read the grain before you swing: split from the bark side inward, aim for existing cracks, and set anything gnarly aside rather than battling it with a short handle.
For cutting branches to length before splitting, a bow saw or pruning saw is faster and safer than chopping. When you graduate to seasoned firewood rounds, the firewood tools guide covers splitters, wedges, and the heavier axes that job needs. Keep the hatchet for the small stuff it does best, and always wear cut-resistant work gloves.
How do you set up a safe splitting station?
Set up a safe splitting station with a solid, knee-to-shin-high chopping block on firm level ground, your footing stable, and everyone else clear of the swing arc. A good block is the single biggest safety upgrade for splitting kindling. Build your station with these steps.- Choose a wide, flat-topped round or stump as a block, tall enough that you split with a slightly bent back rather than hunched to the ground.
- Set it on firm, level ground so it will not rock or tip when struck.
- Stand with your feet about shoulder-width and your weight balanced, the block directly in front of you.
- Clear a metre of space around you of people, pets, tools, and trip hazards before the first swing.
- Keep spare wood, your sheath, and your work gloves within reach but out of the swing path.
A proper block also protects the edge from rock and grit, which dull and chip a hatchet faster than any amount of chopping. Splitting on the bare ground is a leading cause of both injuries and ruined edges, so never skip the block.
How do you make feathersticks with a hatchet?
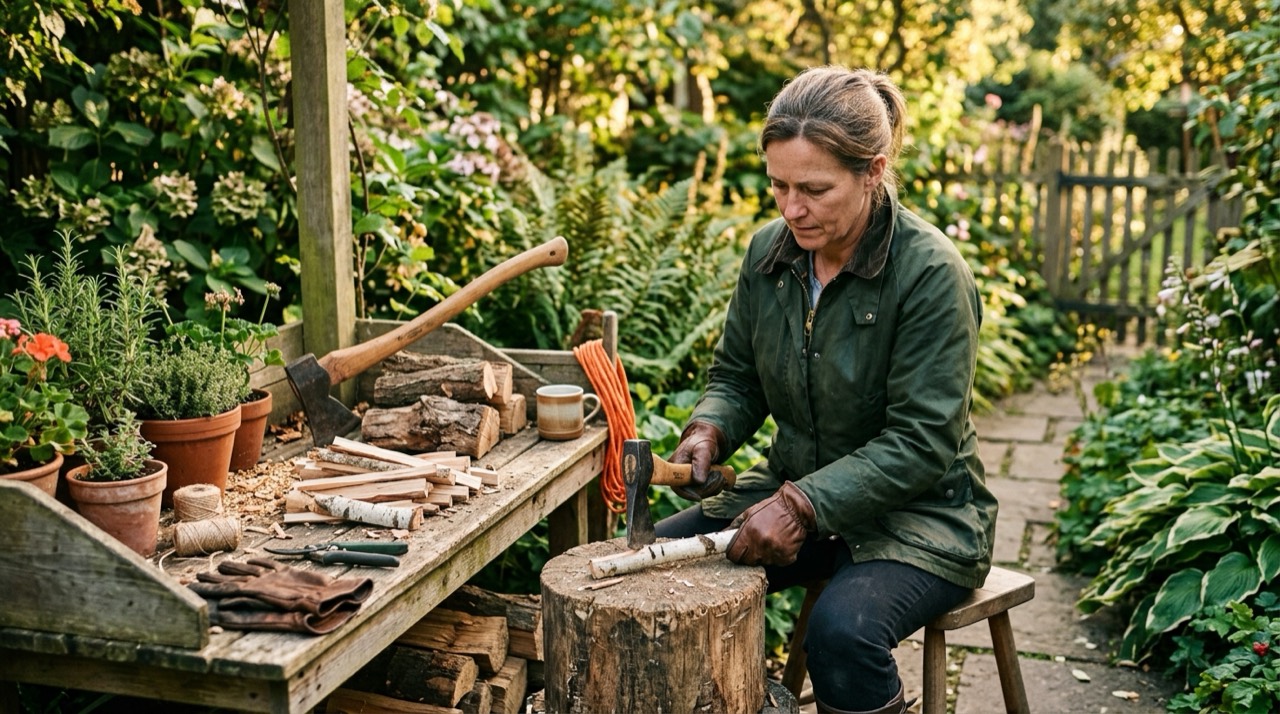
Make a featherstick by shaving thin, curled slivers down a dry stick without cutting them off, creating a fan of curls that catches a spark and lights fast in damp conditions. A sharp, thin edge and a braced, controlled stroke are the keys. Work through these steps.- Choose a dry, straight, finger-thick stick of softwood such as pine or cedar and split it to expose clean inner wood.
- Brace the stick against the chopping block at a low angle, holding it well below where you cut.
- Set the hatchet edge on the wood and push down and away in a slow, controlled slice, choking up near the head for control.
- Peel thin curls without severing them, letting each one stack into a feather at the base of the stick.
- Work around the stick until you have a dense fan of dry curls, then make several sticks for a reliable fire.
Feathersticks are where a keen forged edge, like the convex bit on a Gransfors Bruks or Husqvarna hatchet, earns its keep, because a dull or thick edge tears rather than slices. This fine work is far safer braced and controlled than swung.
How do you split a round down into kindling step by step?
Split a round into kindling by first halving it, then quartering, then reducing each quarter to progressively thinner sticks, always working from the outside toward the centre. Stepping the wood down in stages is faster and safer than attacking a full round. Follow this sequence.- Stand the round on the block and split it in half using the contact method, edge seated before you drive.
- Halve each half again into quarters, choosing the straightest grain and avoiding knots.
- Split each quarter into thumb-thick batons, working from the bark side inward so each split has an escape path.
- Reduce a few batons further to pencil-thin kindling and shave a couple into feathersticks for easy lighting.
- Sort the results into tinder-fine, kindling, and small-fuel piles so you can build the fire in stages.
Work with straight-grained, already-bucked pieces no wider than the hatchet head is long, and set knotty or twisted rounds aside for a splitting axe or maul. Bucking longer branches to length first with a bow saw is faster and safer than chopping them down to size.
What mistakes cause most hatchet splitting injuries?
Most hatchet splitting injuries come from a handful of avoidable mistakes: splitting on the ground, holding the wood in the blade's path, swinging at unstable pieces, and working while tired. Knowing them is how you avoid them. The common mistakes are listed below.- Splitting on the ground instead of a block, so a through-cut carries into your leg or the dirt.
- Holding the kindling with a hand in line with the edge rather than using the contact method or a wood baton.
- Swinging fast at a short, wobbly billet that can tip and deflect the edge.
- Using a loose-headed or dull hatchet, which glances and binds instead of biting cleanly.
- Levering a stuck head up and down until the handle snaps and you lose your balance.
- Splitting knotty, oversized, or frozen wood a hatchet was never meant for.
- Working past the point of fatigue, when tired arms cause the misses that cut.
Fix these and hatchet splitting becomes low-risk: a block, the contact split, a clear path, a sharp and tight tool, the right wood, and cut-resistant work gloves. None of this replaces hands-on instruction, but it removes the errors that send people to the emergency room.