


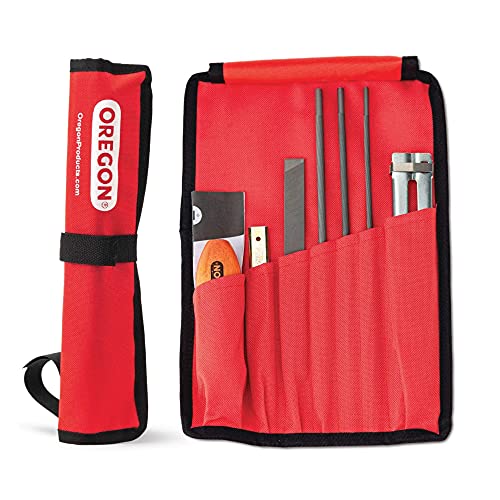

How do you use a chainsaw sharpening kit?
Using a chainsaw sharpening kit means working through its tools in order: the guide and round file first to sharpen the cutters, then the depth-gauge tool and flat file to set the rakers. Every piece in the kit is matched to one chain pitch, so the main task is following the sequence rather than choosing tools.A typical kit holds a round file, a flat file, a filing guide, and a depth-gauge tool. The steps below put them to work.
- Stop the engine, remove the battery or pull the spark-plug boot, engage the chain brake, and put on gloves.
- Clamp the bar in a vise or wedge it so the chain cannot move.
- Fit the round file into the guide, or seat the 2-in-1 tool if your kit has one, at the marked top-plate angle.
- Push the file across each cutter two or three times in one direction, lifting on the return.
- Sharpen every cutter facing one way with equal strokes, then turn the saw and do the rest.
- Every few sharpenings, lay the depth-gauge tool over each raker and file the exposed fin flat.
- Wipe the tools, tap filings out of the files, and roll the kit back into its pouch.
In what order do you use the tools in a sharpening kit?
Use a sharpening kit's tools in a set order: the round file and guide first to sharpen every cutter, then the depth-gauge tool and flat file to lower the rakers. Sharpening the cutters before setting the rakers matters, because the rakers are measured against the freshly filed top plate.The sequence follows the chain itself. First the guide and round file restore each cutting tooth to a keen, matched edge; only then does the depth-gauge tool show how far the rakers stand above the new top plate, and the flat file brings them down. Reversing the order, or setting the rakers against worn cutters, leaves the bite wrong. A 2-in-1 tool folds these two steps together, filing the top plate and lowering the depth gauge in one stroke, which is why kits built around one are quicker for field touch-ups.
How do you set the filing angle with a kit guide?
Set the filing angle by resting the kit's guide across the chain so its marked lines sit parallel to the bar, then file along the angle the guide holds. The guide fixes the top-plate angle, usually about 30 degrees, so every cutter comes out the same without you judging it by eye.Line the guide's reference marks with the bar, seat the round file in the guide against the first cutter, and push through at the angle it sets, two or three even strokes per tooth. Because the guide holds the angle and often the file height too, the main job left to you is keeping the strokes equal. Sharpen every cutter facing one way, then turn the saw and do the rest, resetting the guide each time.
How do you keep every cutter the same length?
Keep every cutter the same length by filing them all to match the shortest one, and by giving each tooth the same number of strokes. Cutters of different lengths make the saw pull to one side and cut a curved kerf, so evenness matters more than taking off a lot of metal.Find the shortest or most damaged cutter first, file it to a clean edge, and note the strokes it took; then match that count on every other tooth. Marking your starting cutter with a paint pen shows when you have gone all the way around. If a rock strike has left one tooth badly short, file the rest down to meet it, keeping the chain balanced even at the cost of a little length.
Mark your starting tooth so you know when you have gone all the way around, and keep the strokes even so the cutters stay the same length. A 2-in-1 kit combines the cutter and raker steps, which is quicker for field touch-ups; our best chainsaw file picks cover both kinds. For the full method and angles, see our chainsaw sharpening guide. This is general guidance, not a substitute for your saw manual's instructions.

